The Party Planning Guide
When to order, how much to get for your guest count, choosing sizes, cutting and serving, transporting your order, and setting a dessert table your guests remember.
Made with love. Planned to perfection.How Much to Order per Guest
Start with your guest count, then decide what role the cake plays: the main dessert, the centerpiece of a treat table, or nothing at all.

Put your guest count in and it lays out a table from our menu, with the price beside every line. Change anything you like - it adds up as you go.
Menu prices, not a quote. These are the current menu prices for the treats and cakes themselves. Delivery, setup, stands and a rush date are quoted separately, and flavours or a design we have not made before can move a line. Send it over and we will come back with the real number.
 cozysweetery.com
 How many treats or cake do you need? Start with your guest count.
One page — print it and keep it| Guestcount | Treats onlyper person | Treats + cakeper person | Cake onlyper person | |||
|---|---|---|---|---|---|---|
| Budget | Abundant | Budget | Abundant | Budget | Abundant | |
| Up to10 | 2–3 each20–30 total | 3–4 each30–40 total | 1–2 each10–20 total | 2 each20 total | 1 slice each10 slices | 1 slice each10 slices |
| Up to20 | 2–3 each40–60 total | 3–4 each60–80 total | 1–2 each20–40 total | 2 each40 total | 1 slice each20 slices | 1 slice each20 slices |
| Up to30 | 2–3 each60–90 total | 3–4 each90–120 total | 1–2 each30–60 total | 2 each60 total | 1 slice each30 slices | 1 slice each30 slices |
| Up to50 | 2–3 each100–150 total | 3–4 each150–200 total | 1–2 each50–100 total | 2 each100 total | 1 slice each50 slices | 1 slice each50 slices |
| Up to60 | 2–3 each120–180 total | 3–4 each180–240 total | 1–2 each60–120 total | 2 each120 total | 1 slice each60 slices | 1 slice each60 slices |
| Up to70 | 2–3 each140–210 total | 3–4 each210–280 total | 1–2 each70–140 total | 2 each140 total | 1 slice each70 slices | 1 slice each70 slices |
| Up to80 | 2–3 each160–240 total | 3–4 each240–320 total | 1–2 each80–160 total | 2 each160 total | 1 slice each80 slices | 1 slice each80 slices |
| Up to100 | 2–3 each200–300 total | 3–4 each300–400 total | 1–2 each100–200 total | 2 each200 total | 1 slice each100 slices | 1 slice each100 slices |
Approximate. Recipes, pans, ovens and the weather all change what you actually need, so read every figure here as a starting point - and make a little more than it says, to cover what breaks, sticks or goes wrong.
Planning for 20 guests? Three easy ways to do it
Cake-forward
A 10″ cake or 6″+8″ tiers plus 1–2 dozen treats for variety.
Dessert table
5–6 dozen treats — about 3–4 per guest, no cake.
Best of both
An 8″ cake centerpiece plus 2–3 dozen treats.
Rule of thumb: when in doubt, round up — extra treats keep beautifully and send guests home happy. Still unsure? Tell us your guest count in your request and we’ll recommend the perfect amount.
Serving Sizes & How to Cut a Cake
“One serving” is not a fixed size. The same cake feeds a room of generous home slices or a much larger crowd of measured venue portions — so here is the one standard we plan by, and the three ways to cut to it.

Cake serving numbers vary because “one serving” is not a universal size. The same cake may produce a small number of generous home-style slices or many more carefully measured venue-style portions. Diameter, height, cutting method, slice footprint, and the person cutting the cake all affect the final yield. This section establishes one consistent cake serving guide so customers can understand why different charts may show different numbers.
| Serving style | Approx. footprint | Best for | What it means | Portions per serving | Guests per serving |
|---|---|---|---|---|---|
| Generous dessert | 2″ × 2″ | Cake-only dessert, family parties, guests expecting a large slice | Largest slices; fewest portions. | Fewerportions | Fewerguests |
| Standard party | 1½″ × 2″ | Birthdays, showers, celebrations, cake after a meal | Balanced party portion; good default for planning. | Moreportions | Moreguests |
| Event / wedding | 1″ × 2″ | Weddings, venues, buffets, dessert tables, multiple sweets | Small controlled portion; highest portion yield. | Mostportions | Mostguests |
| Traditional wedge | Triangular, varies | Small round cakes and casual home serving | Easy to cut, but less consistent and usually lowers yield on larger cakes. | Variesportions | Variesguests |
Approximate. Recipes, pans, ovens and the weather all change what you actually need, so read every figure here as a starting point - and make a little more than it says, to cover what breaks, sticks or goes wrong.
Tip: portions and guest counts vary with cake size, height, and how it is cut.

Tip: match the method to the cake. Plain wedges are the practical cut on a 6″ to 8″. The ring method suits 8″ to 12″, where there is room to score a clean ring and still wedge the centre. The board method works on any cake.
 The same three methods, step by step — the slice width you cut to is what sets the final count.
 Round Cake Sizes & Servings
| Guests |
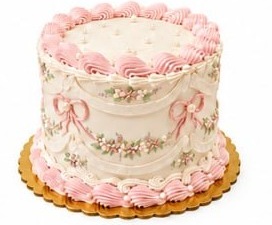 Round Cake Round Cake |
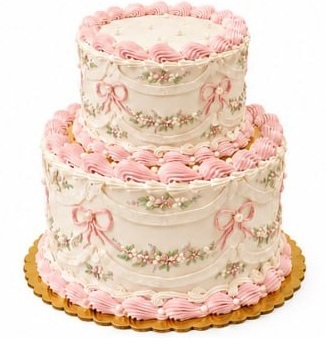 Tiered Cake Tiered Cake |
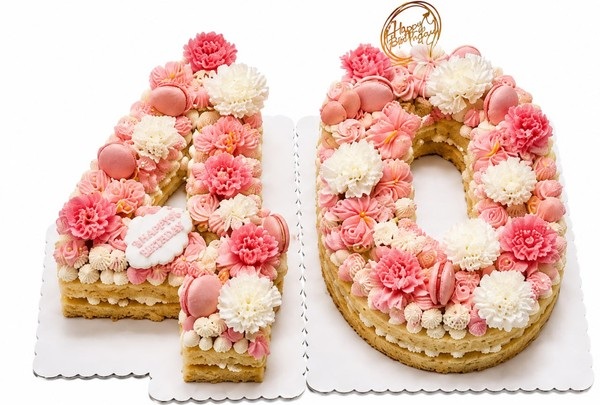 Number Cake Number Cake |
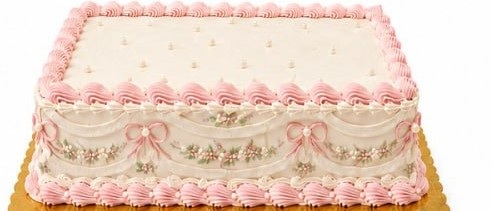 Sheet Cake Sheet Cake |
||||
|---|---|---|---|---|---|---|---|---|
| Home | Venue | Home | Venue | Home | Venue | Home | Venue | |
| Up to 10 | 8″ | 6″ | — | Small 9″1 digit* | — | |||
| Up to 20 | 10″ | 8″ | 6″ + 8″ | Small 9″2 digits* | 9″ × 12″ | |||
| Up to 30 | 12″ | 10″ | 6″ + 10″ | 6″ + 8″ | Medium 12″1 digit* | Small 9″2 digits* | 9″ × 12″ | |
| Up to 50 | — | 12″ | 6″ + 8″ + 10″ | 8″ + 10″ | Medium 12″2 digits* | 12″ × 18″ | 9″ × 12″ | |
| Up to 60 | — | — | 8″ + 10″ | — | Medium 12″2 digits* | 12″ × 18″ | ||
| Up to 70 | — | 8″ + 10″ + 12″ | 6″ + 8″ + 10″ | — | Medium 12″2 digits* | 12″ × 18″** | 12″ × 18″ | |
| Up to 80 | — | 8″ + 10″ + 12″ | — | — | 12″ × 18″ | |||
| Up to 100 | — | — | 8″ + 10″ + 12″ | — | 2 half sheets or 1 full sheet |
12″ × 18″ | ||
- * Number cakes: small 9″ × 2″, one layer · medium 12″ × 4″, two layers. A “1” holds far less than an “8” — see Number & Letter Cakes.
- ** Tight at 70 home-cut portions — cut smaller or add treats.
- — No single-cake option at that count — do two cakes, or size up.
Approximate. Recipes, pans, ovens and the weather all change what you actually need, so read every figure here as a starting point - and make a little more than it says, to cover what breaks, sticks or goes wrong.
Round cake size should be chosen by the experience you want your guests to have, not by the highest number a cake can technically be divided into. A 6″ is a small birthday or cutting cake, an 8″ suits a shower or a dessert-table centerpiece, a 10″ carries a cake-focused celebration, and a 12″ anchors a large party or buffet. How far each one goes then depends entirely on how it is cut — so here are the same four sizes under each serving style.

The same cake feeds more people when the slices are cut smaller — that is the only thing changing across the columns. A wedge widens toward the edge, so its counts land in a range.
| Cake size | Traditional wedgeTriangular, variesJudged by eye — no fixed footprint | Generous dessert2″ × 2″ | Standard party1½″ × 2″ | Event / wedding1″ × 2″Venue & catered events — not a home cut |
|---|---|---|---|---|
| 6″ | 6–8guests | 6–8guests | 8–10guests | 10–12guests |
| 8″ | 10–12guests | 10–12guests | 14–18guests | 20–24guests |
| 10″ | 14–16guests | 18–20guests | 24–28guests | 35–38guests |
| 12″ | 20–24guests | 26–28guests | 36–40guests | 50–56guests |
Approximate. Recipes, pans, ovens and the weather all change what you actually need, so read every figure here as a starting point - and make a little more than it says, to cover what breaks, sticks or goes wrong.
Traditional wedge — triangular slices are judged by eye, so the count lands near the generous column on a 6″ or 8″ and usually below it on a 10″ or 12″, where wedges grow long and uneven. Rectangular cutting stays predictable at every size.
Each slice is drawn at true scale beside a credit card — the width you cut to is the only thing that changes the count.

Not sure which to choose? Standard party is the count we quote — a proper slice for everyone, and usually a few pieces left over. The event portion is a venue cut: count on it only when a caterer is doing the serving.
A cake does not suddenly become larger at a venue; the difference is the portion standard. A 2″ × 2″ dessert portion has twice the footprint of a 1″ × 2″ event portion. That alone can dramatically change the number of pieces cut from the same cake.
Tall cakes add more height to each serving, but the footprint used for cutting still controls the count. Cutting consistency matters too: measured rectangular portions produce a more predictable yield than casual wedges.
 Cut into 2″ portions
  Cut into 1″ wedges
 Three ways to cut the same cake
Traditional wedges
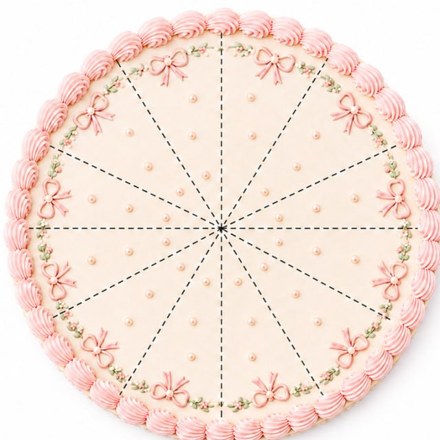
Straight cuts through the centre, judged by eye — 4 quarters, then 3 wedges from each.
Slab / column
Cut the cake into parallel slabs, then across into rectangles — 5 slabs of 3.
Rings & wedges
Score a 2″ ring in from the edge, cut it into slices, then wedge the centre — 12 + 6.
The same 8″ cake all three times — the method, not the cake, sets the count. Step-by-step diagrams are in Cutting a Round Cake.
Home party vs. venue service
Home party
- Cut by the host — larger, less-uniform slices
- Some guests get bigger pieces
- Use the comfortable customer count
Venue / caterer
- Cut by staff with a controlled method
- Smaller, uniform rectangular portions
- Higher event yield can be realistic
Tip: when you are between two sizes, listen to what the customer tells you.
| Customer says… | Recommendation |
|---|---|
| “We want big slices.” | Size up. |
| “Cake is the only dessert.” | Size up. |
| “We want leftovers.” | Size up. |
| “Guest count may increase.” | Size up. |
| “There will be a full dessert table.” | A smaller cake may work. |
| “A caterer will cut small event portions.” | Technical event yield may be used. |
| “I don’t see the cake size I need in the chart.” | Just ask. We make in-between and larger sizes — request a quote. |
Guidance, not a rule. Kitchens, cars, venues and Florida weather all differ, so read this as the safe starting point and give yourself a little extra room on a hot day.
Sheet Cake Sizes & Servings
| Sheet | Generous 2×2 | Party 1½×2 | Event 1×2 |
|---|---|---|---|
| 18″ × 24″ | 108 | 144 | 216 |
| 12″ × 18″ | 54 | 72 | 108 |
| 9″ × 12″ | 24 + strip | 32 + strip | 48 + strip |
Approximate. Recipes, pans, ovens and the weather all change what you actually need, so read every figure here as a starting point - and make a little more than it says, to cover what breaks, sticks or goes wrong.
Grid-cut cleanly
- Score the top, then cut all lines one way, then the other.
- Lift corner pieces first; wipe the knife between cuts.
About the 18″ × 24″: it is a full sheet — the largest single pan we bake. Clear a flat two-foot space in the car and a whole counter or table at home. It will fit in the fridge, but it takes up most of a shelf.

Tip: nine inches does not divide by two, so every grid leaves the same 1″ strip along one side — cut it into extra small pieces or keep it back for seconds.
Two Cakes Beat One Large One
Past roughly sixty guests a single decorated cake gets very large and very expensive. The usual answer is a small decorated cake for the table and a plain sheet cake cut out of sight.
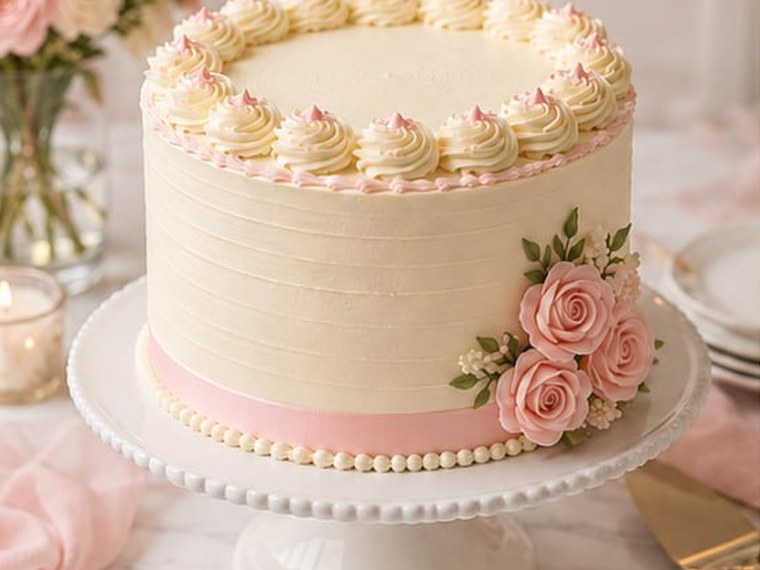
Display cake
- A 6″ or 8″ round, fully decorated
- Sits on the table and appears in the photos
- Cut ceremonially, then served
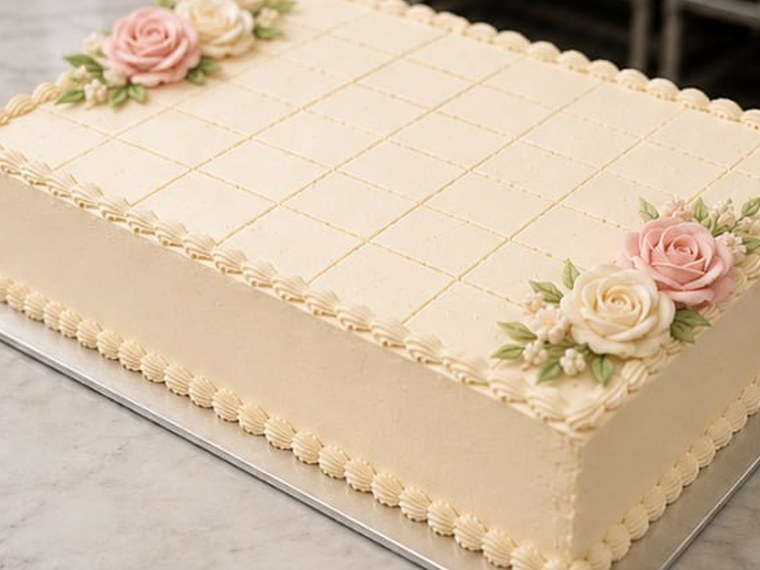
Serving sheet cake
- A 12″ × 18″ sheet, plain‑iced, same flavour
- Stays in the kitchen and is grid‑cut
- Serves 72 at a party portion
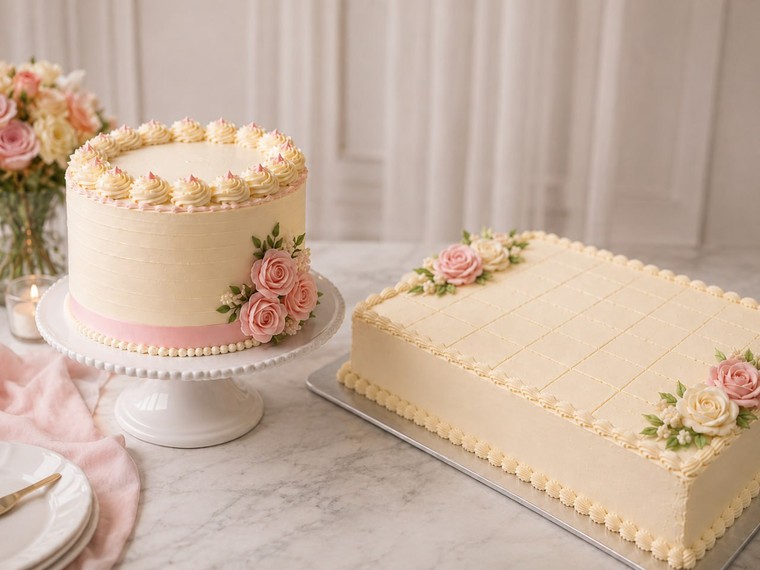
An 8″ display cake with one 12″ × 18″ sheet — for far less than a single decorated cake that size.
Say so when you order and we match the sheet to the display cake’s flavour and icing.
Tiered Cake Sizes & Servings
| Tiers | Party yield | Event yield |
|---|---|---|
| 6″ + 8″ | 22–28 | 30–36 |
| 8″ + 10″ | 38–46 | 55–62 |
| 6″ + 8″ + 10″ | 46–56 | 65–74 |
| 8″ + 10″ + 12″ | 74–86 | 105–118 |
Approximate. Recipes, pans, ovens and the weather all change what you actually need, so read every figure here as a starting point - and make a little more than it says, to cover what breaks, sticks or goes wrong.
Tip: the event column is a catered cut for larger events and weddings, where staff serve 1″ × 2″ portions. For a party at home, read the party column.
Tip: separate the tiers before cutting — lift the top tier, then pull out the dowel and support straws.

- Remove toppers and non-edible decorations.
- Slide a spatula under the top tier’s board and lift it straight up.
- Pull out the support dowels below, then cut each tier like a round cake.
- Never cut blindly — check for boards and supports first.
Number & Letter Cake Servings
| Size | Home cutcomfortable slices | Venue cutsmall uniform portions |
|---|---|---|
| Small · one digit9″ tall · 2″ thick | 10 guests | 14 guests |
| Small · two digits | 20 guests | 28 guests |
| Medium · one digit12″ tall · 4″ thick | 28 guests | 38 guests |
| Medium · two digits | 56 guests | 76 guests |
Approximate. Recipes, pans, ovens and the weather all change what you actually need, so read every figure here as a starting point - and make a little more than it says, to cover what breaks, sticks or goes wrong.
Both sizes are baked as two layers, and letters follow the same two sizes.
A number or letter is carved from a slab, so the count follows the edible area of that one shape.
A “1” is little more than a narrow bar; an “8” fills almost the whole slab, and a “0” gives much of it back through the open center. Two the same height can differ by half.
So we quote from the two standard sizes above, not a per-digit chart — those counts already allow for an average shape. Tell us your digits and we confirm the exact number.
Cutting one at home: work from the widest section in roughly 2″ strips, lift each onto a board and portion it there. Double digits are counted separately and added.

Cake Care, Storage & Transport
One job in two halves: get it home level and cool, then keep it that way until it is cut. Both halves are on the card above, in the order they happen.
| Stage | Best practice |
|---|---|
| Before | Pre-cool the car; clear a flat area; non-slip mat |
| Placement | Flat, level floor — never a slanted seat |
| Driving | Cool, slow turns, gentle braking, out of the sun |
| Carrying | Two hands underneath, level; don’t squeeze the box |
Guidance, not a rule. Kitchens, cars, venues and Florida weather all differ, so read this as the safe starting point and give yourself a little extra room on a hot day.

| Stage | Do | Avoid |
|---|---|---|
| On arrival | Keep level; refrigerate if the label says so; keep in the box | Sun, heat, humidity, weight on the box |
| Before serving | Let chilled buttercream soften slightly; remove non-edible decor | Cutting through dowels, wires, ribbons |
| Leftovers | Cover cut surfaces; refrigerate perishable fillings | Leaving perishable cake out too long |
Guidance, not a rule. Kitchens, cars, venues and Florida weather all differ, so read this as the safe starting point and give yourself a little extra room on a hot day.
How to Store Decorated Cookies
Decorated cookies keep well. Chocolate and meringue do not — they are the two things on the table most affected by heat, damp and handling, so they have their own rules below.
| Situation | Recommended |
|---|---|
| Storage | Sealed / airtight, room temp, cool & dry, out of sun |
| Refrigeration | Avoid unless told to — fridge humidity harms royal icing |
| Handling | Handle raised flowers & bows gently; don’t stack |
| Best quality | Within the stated best-by window |
Guidance, not a rule. Kitchens, cars, venues and Florida weather all differ, so read this as the safe starting point and give yourself a little extra room on a hot day.

| Treat | Do | Avoid |
|---|---|---|
| Dipped treats | Keep boxed, cool and indoors until you serve; set out in the shade, a tray at a time | Outdoor tables, a warm car, direct sun, anywhere humid |
| Meringues | Keep sealed and dry, sitting flat; lift one at a time, from underneath | Stacking, humidity, the fridge, any weight on the box |
Guidance, not a rule. Kitchens, cars, venues and Florida weather all differ, so read this as the safe starting point and give yourself a little extra room on a hot day.
Party Day & the Dessert Table
The order is made, the table is planned — here is how the day itself runs.
How the day flows
- Pickup: collect the order the morning of, or the day before if you have cool, level space to store it.
- Setting up: dress the table 1–2 hours ahead. Keep the cake boxed and cool until the table is ready.
- Placement: away from windows, ovens, and direct sun. Tall items at the back, the cake at the center.
- Cutting: about an hour into the party, or right after the meal. Take your photos first.
- Leftovers: cover the cut faces, refrigerate anything perishable, and send treats home in boxes or bags.
Have ready on the table
- Long thin knife, warm water and a cloth
- Cake server and a small offset spatula
- Plates, forks, napkins, tongs for cookies
- Cake stand or riser, plus a few smaller risers
- Take-home boxes or favor bags
Party Dessert Questions
How far ahead should I order?
At least 14 days for local pickup and delivery, 21 days for shipping. Four to six weeks is safer for popular weekends and holidays.
How many people does an 8″ cake serve?
About 14–18 with standard party slices — up to about 24 with small event portions.
How many cookies or treats do I need per person?
Two to three each when the treats are the whole table, and one to two each when there is a cake beside them. Make it three to four for a long grazing table or a room full of children.
Cake, treats, or both?
Cake as the only dessert means one slice per guest. With a treat table, size the cake down and plan 1–2 treats per guest on top.
Should I size up?
Yes — if cake is the only dessert, you want big slices, you’d like leftovers, or the guest count may grow.
What’s the best cutting method for a tall cake?
The board method: cut a slab, move it to a board, and portion into neat rectangles.
Can I cut the cake myself?
Absolutely. Remove non-edible decor first, use a long clean knife, and wipe between cuts.
How do I store decorated sugar cookies?
Sealed at room temperature, out of the sun and away from humidity, and flat rather than stacked on their icing. Do not refrigerate them — condensation on the way back out is what makes royal icing bleed and go dull.
How do I transport a cake in the car?
Flat and level on the floor, never on a slanted seat. Pre-cool the car, drive slowly through turns, brake gently, and keep it out of the sun.
Do you provide serving guidance?
Yes — tell us your guest count and event, and we’ll help you choose the right size.
Let us help you plan it
Tell us your date, your guest count and the occasion — we’ll put together the cake, the treats and the timing.
Holding your date
After that we would still love to bake for you, but we can no longer promise the original date, and the price may need a small adjustment - the closer the date, the harder it is to fit in.
Receiving a quote, or saying yes to one, does not place you on the baking schedule. The deposit does. Until it is paid the date stays open to everyone.
Everything is baked to order in a small kitchen, so each day holds only a few orders and the busy weeks fill up early. Our availability calendar always shows the dates still open.
Thank you for understanding - it is how we make sure every order gets the time and care it deserves.